
Registering a dataset
Registering datasets is a good way to give exposure to your dataset and link it with your other scientific output. The RIS interface allows you to easily register your scientific datasets, making them visible in the Radboud Repository and on the internet, and registering them as research output of your institute. This guide gives you all the information you need to register a dataset.
Note 1: This manual assumes that the dataset has already been uploaded and made publically available in a sustainable archive. RIS is purely a registration system and it is not possible to store your data in RIS.
Note 2: Datasets stored in the Radboud Data Repository (RDR) are automatically registered in RIS once you have archived or published the collection. You do not need to manually register RDR collections in RIS.
Step 1: Adding a new result
Start by adding a result in the RIS interface using the register button:

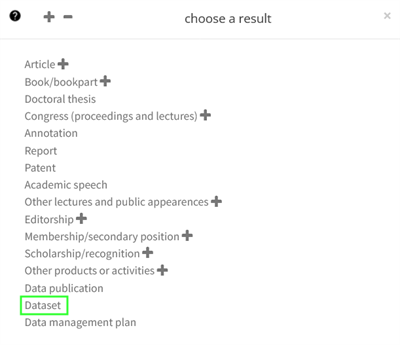
Next, choose the result category dataset:
Once you have done this, you can tick the personal key publication box to make your publication visible as a key publication on your Radboud University profile page:

A new dataset entry has been created. The next step is to enter the authors and metadata.
Step 2: Adding authors
Add any other authors that have worked on the publication in question, in addition to your own name. The following icons are visible in the authors menu:
![]() The magnifying glass next to the empty author field opens a search field that allows you to find a colleague.
The magnifying glass next to the empty author field opens a search field that allows you to find a colleague.
![]() The information icon displays employment data of the researcher in question.
The information icon displays employment data of the researcher in question.
![]() Removes the author from this particular publication.
Removes the author from this particular publication.
To change the order in which the authors appear, select a number from the drop-down menu to the left of the author's name.
Adding authors listed in RIS
Adding authors can be done in three ways:
- By adding related results, you can easily select authors from those related result without having to search for them in RIS. See Step 4: adding related result on how to do this.
- You can type the last name of the author in the empty name field. If there are no other persons with the same last name in the system, the rest of the information will be filled in automatically. Check if this information is correct! If there are multiple persons with this last name, a pop-up will appear, allowing you to select the correct name by clicking on the box in front of it. Note that sometimes there are multiple entries for the same author in the help list. Always choose the author name that is preceded by a P (preferred).
- Click the magnifying glass icon next to the empty author field. This will open a search field. Type the name of your the author in the search field and press enter. Next, click one of the three show buttons depending on the list of results you want to see. In the list, select the correct name by clicking on the box in front of it. Note that sometimes there are multiple entries for the same author in the help list. Always choose the author name that is preceded by a P (preferred).
Adding authors that are not listed in RIS
If the author can not be found in the list of researchers, i.e. when the search field does not yield any results, you can add external authors manually. Contact your faculty's metis administrator in case an author from within Radboud University is missing. To add a new author, follow these steps:
- First be sure to check the spelling of the author's name. This prevents double listing and/or misspelled entries. If you are sure the author is not in the system continue with step 2.
- Enter the author’s name in the open fields name, initials, prefix (optional) and title (optional). Please note that prefix is a seperate field and a prefix should not be entered in the name field. For example, for the last name de Vries, enter Vries in the name field and de in the prefix field. Once all the fields are filled, press enter.
- A pop-up screen saying “This is a new researcher or author in Metis” will open. Click add.
Step 3: Adding metadata
Rich metadata (i.e., information about your dataset) allows others to find your dataset. Therefore, it is important that the metadata of your dataset is complete, logical, understandable and in English.
We advise you to fill the metadata fields with an exact copy of the corresponding metadata fields of the repository your dataset is stored in. If a metadatafield is not present in the original repository, please add the information in RIS.
Most of the metadata fields in the RIS interface are further explained by means of question marks (?) containing extra information. Please pay particular attention to the following metadata fields:
- Archive: please select the name of the repository. When it is not listed, choose Other and specify the exact name of the repository.
- Description: give a concise description of the character and the purpose of the research, the nature of the data, and the way the data were collected, processed and analysed (example 1 and example 2). Here, you can make use of the introductory text of your research proposal or summaries of corressponding papers.
- Date available: When your data are not accessible just yet, you can indicate the embargo that is placed on your dataset in this field. You can enter the date when the embargo ends.
Step 4: Adding related results
you can link your dataset to other relevant publications and/or datasets by adding relevant publications in the Related results section. You can only add publications and/or datasets that have already been registered in RIS. For registering publications in RIS, see the manual on registering publications. In order to add related results follow these steps:
- Click Add results & researchers...
- A pop-up screen will appear that allows you to search for the publications you would like to add.
- A second pop-up screen appears allowing you to add authors to your dataset. In this pop-up, select the authors that you would like to be listed under the Authors section. Click connect selected authors. The selected authors are now visible under the Authors section.
Step 5: Changing the status of your dataset
Once you've finished registering your dataset in RIS, do not forget to change its status to input completed under the Type section at the top of the page and click save in the top menu bar.
Your input will now be checked and made public. If your dataset has the status public, it will appear on your profile page and in the Radboud Repository.